Showing posts with label #chickfilamomsDIY. Show all posts

Tuesday, February 28, 2017

Chick-fil-A DIY Upcycling Challenge (CFA Stamp) #chickfilamomsDIY

chickfilamomsdiy, upcycle, DIY, DIY stamp
DIY Chick-fil-A Stamp

Ok everyone, I just did a post recently on a Travel Jewelry Box that the girls and I made from upcycling a Chick-fil-A soup container as part of a Chick-fil-A upcycling challenge.  The kids and I came up with another idea and I wanted to share it with you as well - DIY stamps.  These are so easy to make (you can literally do this craft in 5 minutes if you wish) and the fun and creativity afterwards is endless.  Enjoy!

Chick-fil-A Chicken Tortilla Soup

 
Chick-fil-A Fruit Cup

Not only can you create these DIY stamps from the lid of Chick-fil-A soups, you can use their fruit cup lids as well!

My containers

After cleaning and drying the lids, simply cut out the middle logo.  If you leave a little bit of room on the sides it makes using the stamps easier.

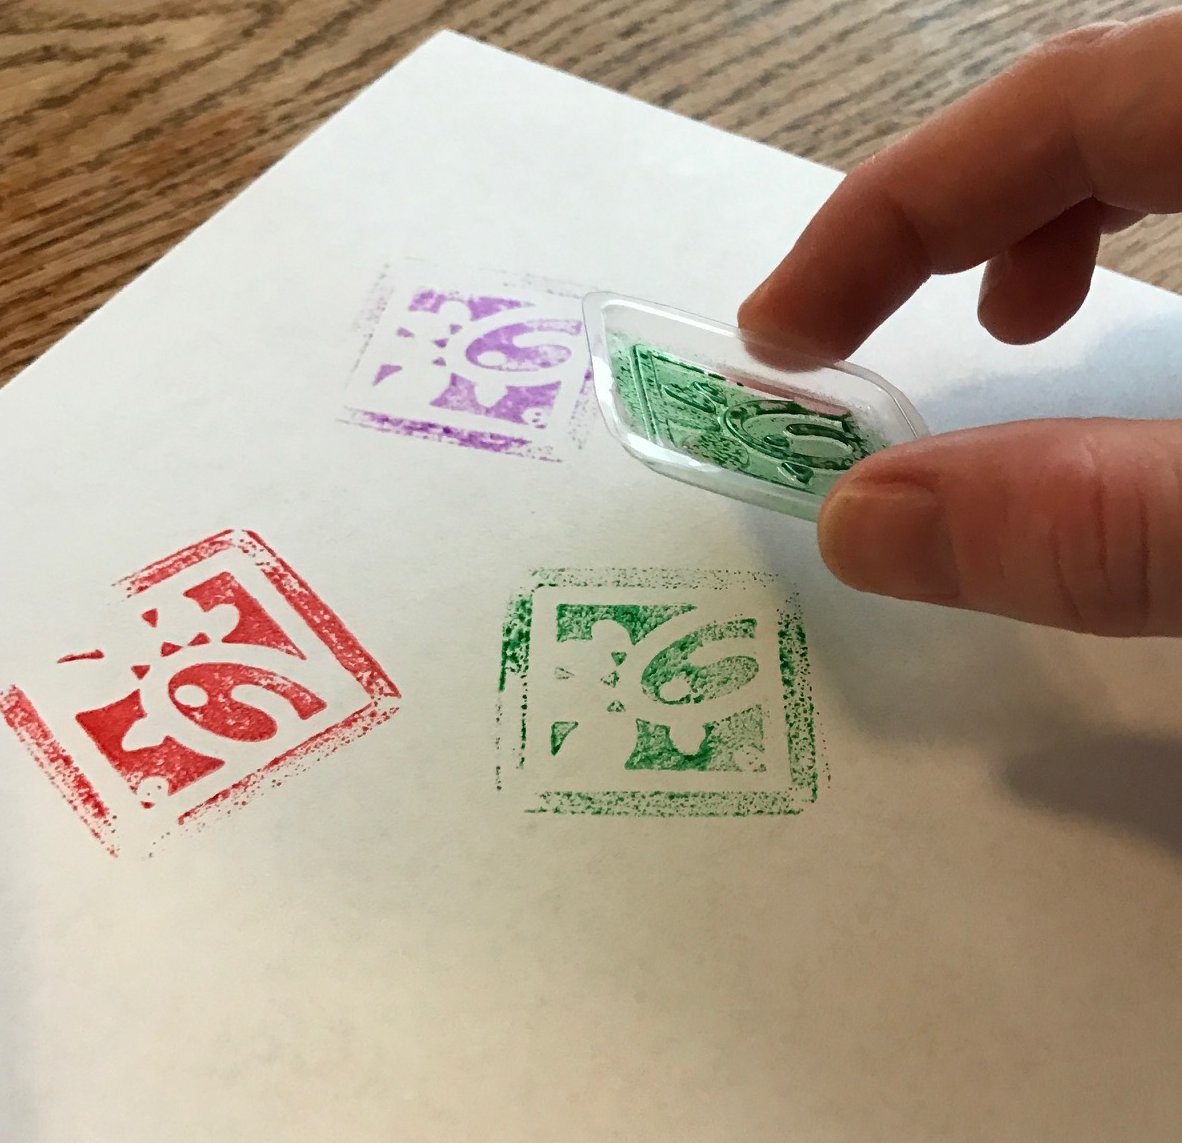
My new Chick-fil-A stamp, it really is that easy!

We used the Melissa and Doug Washable Ink Pad to create our masterpieces.  I love that it is washable, has six vibrant colors, and fits our new CFA stamp perfectly.

 A perfect fit.

Now, is where the real fun begins.  We had so much fun using the stamps to create fun pictures.  I am always amazed at the kids creativity.

I made boxes first.


And then used a pen to turn them into kites.


The supplies I used.

Here is A...

Creating a flower

And a butterfly

A's flower and butterfly

She also created her initial.

And a photo frame.

B creating...

B making a coconut tree

B's tree

And with coconuts of course

D using the stamp

D's person - isn't she cute?

D's cupckae

A present

E creating a kite.

You can take a simple stamp

and turn it into anything!

I love that you can make cards, messages, pictures, you name it - the possibilities with this fun Chick-fil-A stamp are endless.

Thursday, February 23, 2017

Chick-fil-A DIY Upcycling Challenge (Travel Jewelry Box) #chickfilamomsDIY

https://www.chick-fil-a.com/

It's no secret that my family loves Chick-fil-A.  I have been privileged to be a part of a Chick-fil-A Moms panel for a few years and I love having the opportunity to give my input and hear about upcoming events and ideas in a company that I truly believe in and love.  Recently, I was given a challenge to upcycle my Chick-fil-A soup containers.  The older girls and I thought about it for awhile and then we had a great idea - a travel jewelry box!  A and B are super excited about this because it is a great way to bring along some of their earrings, necklaces, etc. when we are out and on the go and they have them if needed.

 Chick-fil-A serves both chicken tortilla soup and chicken noodle soup.  Above, you can see the chicken tortilla soup I ordered for lunch.

And now you don't see it - yum!  After I ate my soup, I cleaned my soup container with hot water and soap.

I also used a push pin to clean any residue that was left along the edges of the CFA logo picture to get it extra clean.

I used the push pin to create small holes in the lid to serve as earring holders for our jewelry box.  After making the above pattern, I decided to make a few more on the top and bottom of the lid.  

 
There is a lot of flexibility here to create the design and pattern that you desire.

 Here is another pattern that we made.

Ready to paint.  After creating all the holes for earrings, my container was ready to paint.

I found this beautiful Turquoise Paint on Amazon and thought it would be perfect.

I decided to use painter's tape to keep most of the lid clear; however, I wanted the logo turquoise.

Now, the lid is ready.

I set up an area on my front porch and painted the top and bottom of my soup container.

I love the color!

 After letting both parts completely dry, I brought them back into the house.

 
 The bottom of the soup container no longer, now the bottom of our jewelry box.

 
 My soup container lid no longer - travel jewelry box lid now!

 
 After removing the tap - I love how it looks.  You could easily paint the entire lid if desired.

 We did this for our second pattern to show how you can really customize your box.

 B chose some of her earrings to go on the box in the earring holders.

 
 Our jewelry box so far.

 
 And a side view so you can see the turquoise on the bottom.

 A side view of our second option.

 We decided to use a few Chick-fil-A straws to help out our new jewelry box as well.

 
 We unwrapped the straws and cut them so that they could serve as necklace detanglers.  Straws can help keep your necklaces from tangling with each other when placed together.

 
 A few necklaces with straw pieces

 We put the necklaces in the bottom of our jewelry box and we were done.

 
 Side view of our completed travel jewelry box!

 
 And of course, a top view!

 Our second option as well.

I love it!  I am so proud of what we created.

What do you think?  Do you have other ideas on how to upcycle your Chick-fil-A soup containers?  I would love to hear about them.  Please feel free to leave a comment or link to your own DIY post and I'll check it out.